 (412) 829 7711
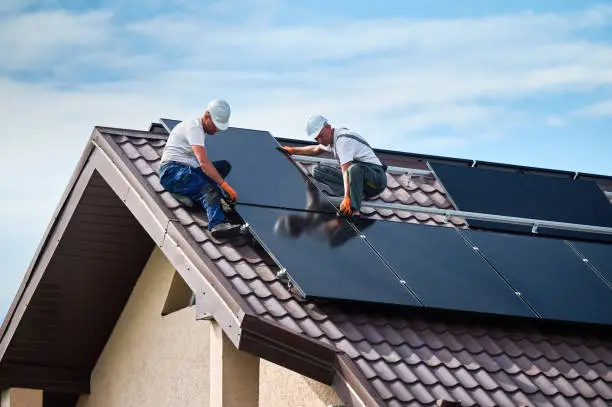
Solar energy is transforming how Pittsburgh homeowners power their homes, offering significant savings and environmental benefits. However, successful solar panel installation depends heavily on proper roof preparation. Before installing solar panels, your roof must be structurally sound, compatible with mounting systems, and ready to support the additional load for decades to come. This comprehensive guide will walk you through the essential steps to prepare your roof for solar panel installation, helping you avoid common pitfalls and maximize your solar energy investment.
Why Roof Readiness Is Essential for Solar Panel Installation
Proper roof preparation is the foundation of any successful solar panel installation. Without adequate preparation, even the highest-quality solar equipment can fail to deliver the expected results or cause significant damage to your home.
Avoiding Costly Delays and Rework
Inadequate roof preparation often leads to project delays and expensive rework. When solar installers discover structural issues, outdated materials, or compatibility problems during installation, the project must halt while these issues are addressed. This can extend your timeline by weeks or months and significantly increase costs. By addressing roof concerns beforehand, you ensure a smooth solar panel installation process that stays on schedule and within budget.
Supporting the Structural Load
Solar panels add significant weight to your roof structure, typically 2-4 pounds per square foot for the panels themselves, plus mounting hardware and potential snow loads. Your roof must be capable of supporting this additional weight without compromising structural integrity or safety.
The load from solar panel installation isn’t just about total weight; it’s also about how that weight is distributed across your roof structure. Mounting points create concentrated loads that require adequate support from the underlying framing. Without proper evaluation and reinforcement where needed, solar panel installation can lead to sagging, cracking, or even structural failure over time.
Step 1: Conduct a Professional Roof Inspection
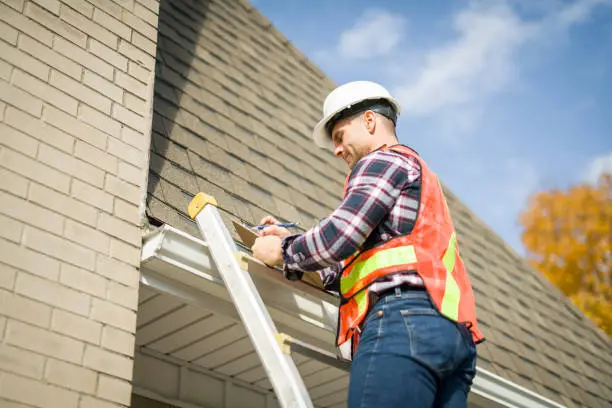
A thorough professional inspection is the critical first step in preparing for solar panel installation. This inspection goes beyond what homeowners can assess themselves, identifying potential issues that could complicate or compromise the installation process.
What We Look For
During a pre-solar inspection, roofing professionals examine multiple aspects of your roof’s condition and suitability. We assess the overall condition of roofing materials, looking for signs of wear, damage, or deterioration that could worsen under solar equipment.
When to Repair or Replace
Professional inspection reveals whether your roof needs repairs or complete replacement before solar panel installation. Minor issues like loose shingles, small leaks, or damaged flashing can typically be repaired without delaying your solar project significantly.
However, roofs nearing the end of their useful life should be replaced before solar panel installation. Installing solar panels on an aging roof means you’ll likely need to remove the panels within a few years to replace the roofing, doubling your costs and complications.
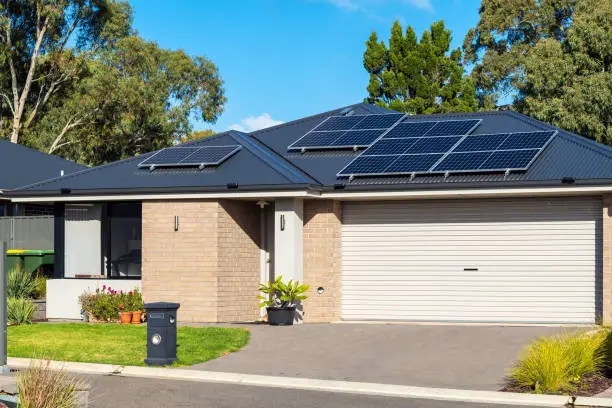
Step 2: Evaluate Roof Type, Material, and Slope
Not all roofs are equally suited for solar panel installation. Understanding your roof’s characteristics helps determine the best approach for mounting solar panels and may influence your choice of solar equipment.
Compatible Roof Materials for Solar Panel Installation
Asphalt shingles are the most common and straightforward material for solar panel installation. Standard mounting systems work well with composition shingles, and the installation process is relatively simple and cost-effective.
Metal roofing offers excellent compatibility with solar panel installation, often providing the strongest and most durable mounting options. Standing seam metal roofs allow for clamp-on mounting systems that don’t require roof penetrations, preserving the roof’s integrity.
Tile roofs require special consideration for solar panel installation. Clay and concrete tiles are heavy and brittle, requiring careful handling and specialized mounting techniques.
Slate, wood shake, and other specialty materials may present challenges for solar panel installation. These materials often require custom mounting solutions and experienced installers familiar with their unique characteristics.
Step 3: Ensure Structural Integrity and Load-Bearing Capacity
Structural evaluation is perhaps the most critical aspect of roof preparation for solar panel installation. This step ensures your roof can safely support the additional weight and forces that solar panels will impose over their 25+ year lifespan.
Roof Framing and Load Analysis
Professional structural analysis examines your roof’s framing system to determine its capacity for solar panel installation. In some cases, structural reinforcement may be necessary before solar panel installation. This might involve adding additional framing members, strengthening connections, or upgrading fasteners to meet load requirements.
Step 4: Upgrade Roof Components if Needed
Based on the inspection and structural analysis, certain roof components may need upgrading before solar panel installation. These upgrades ensure optimal performance and longevity for both your roof and solar system.
Common Pre-Installation Upgrades
Roof decking upgrades are common when preparing for solar panel installation. Older homes may have to skip sheathing or use thin plywood that doesn’t provide adequate support for solar mounting systems. Upgrading to thicker, structural-grade decking improves load distribution and mounting security.
Ventilation systems often need modification for solar panel installation. Ridge vents, soffit vents, and exhaust fans may need relocation or replacement to work effectively with solar panels. Proper ventilation remains crucial for roof health and energy efficiency.
Electrical system upgrades frequently accompany solar panel installation preparation. Your electrical panel may need upgrading to handle solar production, and new conduit runs may be necessary to connect rooftop equipment to ground-level inverters.
Flashing and waterproofing upgrades ensure long-term weather protection. New flashing around roof penetrations, upgraded underlayment, and improved drainage systems protect against water infiltration that could damage both the roof and solar equipment.
Roof Replacement Considerations
When roof replacement is necessary before solar panel installation, timing becomes crucial. Replacing the roof immediately before solar installation allows for integrated planning and can reduce overall project costs. New roofing materials can be selected specifically for solar compatibility. This might include choosing specific shingle types, colors, or materials that work best with your planned solar system.
Roof replacement also provides an opportunity to optimize the roof design for solar production. This might include adjusting roof pitch in certain areas, relocating vents or other obstacles, or adding structural support where needed.
Conclusion
At JP Roofing, we understand the unique requirements of solar panel installation and work hard to ensure your roof is properly prepared. Our experience with Pittsburgh’s climate conditions and building requirements helps us identify potential issues early and develop effective solutions.
Don’t let inadequate roof preparation compromise your solar investment. Contact us today to schedule a comprehensive inspection and discuss how we can prepare your roof for successful solar panel installation. Our team of experienced professionals will ensure your roof is ready to support clean, renewable energy for decades to come.
Recent Comments